Sunday, August 15, 2010

Summery yellow!

 
Hi all!
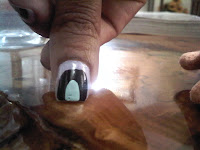
I decided last week that I needed something summery to do with my nails.  We just came out of June gloom here in LA, so I needed something to go with the boatloads of sunshine.  That, and I had just gotten back from my trip to visit my mom in AZ.  When I was in AZ, I stumbled upon some nail decals at the 99 Cent Store.  I'm not one to pass up nail supplies, let alone 99 cent ones, so I, of course, bought them.  I liked how these nails turned out, but the decals were a bitch to remove!  They literally would NOT be swayed by my various nail polish removers.  I had to pick these off, and luckily that didn't cause my nails to chip!  After that, I had to remove the polish that was still stuck from underneath the nails.  I'm probably complaining more than necessary, as this wasn't THAT big an issue, just a small nuisance.
 
AAAAANYWAY, here's my method for using nail decal stickers.  There may be a better way that keeps them on longer or there may be some different tricks to using them - if someone knows any, please share!
 

What you need:
*Base and Top coat
*Nail polish color
*Nail decal stickers
*Tweezers, or some other item that makes picking tiny things up easy

How you do it:
*Apply your basecoat and let dry.
*Apply 2 coats of your nail polish and let dry.
*Very carefully, grab your tweezers.
*Very carefully, use the tweezers to loosen the sticker from the sheet and pick it up.
*Using the tweezers to center in on the location where you want to place the sticker, gently place the sticker on your nail.
*With a pointy part of the tweezers, you can lightly press the sticker until it is fully attached to the nail.
*Apply your top coat and let it dry.
*Voila!  Fabulous nails!


Hope this is somewhat helpful to someone!

On another note, I'm going to really try to carry around and use a real camera for my pics in the future.  My phone pictures are just so low quality.  I generally try to mess with them a little in Photoshop to make them look better, but even that doesn't help all the time.  I hope you guys can bear with them at the moment at least! :)

XXOO,
Steph

Monday, July 19, 2010

Back from the dead!

Wow, I haven't posted on here in a LONG time.  I've been traveling, and busy with work.  Buuuut!  I'm back.  Woot.  Needless to say, I've gone through a bunch of different nails in that time period, so maybe I'll just show you pics of everything I have gone through and then come back and write about them later, if more detail is needed ;)

Let's start with my Father's Day nails!  These were special to me, because I really miss my dad.  He lives across the world and so I haven't seen him in...3 or 4 years :-/  Scary right?  Anyway, I did Sierra Leone flag nails in honor of him for Father's Day.


Then, being super-excited for Eclipse to come out, I went vampy for a good couple of weeks.  This is a blatant rip-off of Polish Hoarder Disorder (PHD)'s blog (hers were staggeringly better than mine :) ), but I really loved the look and thought it would be perfect for my vampire-themed pre-Eclipse bonanza.  This was a really frustrating look to achieve, because the color had a lot of bleed.  I used my Scotch tape trick to cover up the edges, but it didn't work super-well and I had to use nail polish remover on a Q-tip to really carefully clean them up.  It didn't fully work on some of them, so I filled in that little gap with nude-looking polish.  Oh well, I thought they looked cool in the end!


Then I went on to peacock-esque nails!  I started these with a totally different look in mind, but they kind of evolved into this.  I used light purple on the full nail, then used a dark vampy color to fill in a smaller area.  I wore it like that for a day, and decided it needed something more, so I added the mint green color and BAM!  They looked MUCH better.  Needless to say, it took longer than usual to get this polish off since there ended up being so many layers!


Lastly, I am now at the striped phase!  I've been dying to try those Art Deco nail pens and I found a ton of them at the 99 cent store while visiting my mom!  I thought stripes would be the perfect test.  They turned out great!  Definitely a good buy - I know I'll be using them a ton in the future!  I've gotten tons of compliments on these.  They definitely feel really unique.


Oh!  While I was in AZ visiting my mom, she let me do her nails!  She's never let me do them before, but after a little convincing - I got to them.  I tried using Silk Wraps on them as well, as she is often saying her nails aren't very strong.  I haven't used them before, but have really been wanting to test them out.  They are VERY cool.  And not visible at all if you smooth them out properly.  I expected her nails not to chip for a while, but she does dishes a lot, so they chipped after a few days.  Sigh.  Oh well, I thought they turned out great!  I used one of those tiny Sally Beauty Supply polishes.  It was a nice color (like a deep red) and then I stamped one of my Faux-nads onto her index fingernails with white.

Hope you enjoy!

P.S. Sorry for the quality of the pics - they were all taken with my phone ;)

Monday, June 21, 2010

Watermelons!

It's summer!  Why not celebrate it by eating some fresh fruit, hanging out by the pool/ocean, and having some good 'ol fun?  I'm quite the homebody myself, but I do enjoy the things that summer offers!  Therefore, I decided to go for some watermelon-themed nails!  Can't get much more summery than that, right?
How I did it:
1.  Start with a base coat.
2.  Paint a pink polish across entire nail (various pinks could work for this - this was the closest I had)
3.  Paint a french tip on all nails with a green color (I used Sally Hansen Hi-Def color)
4.  Allow to dry
5.  Using either a nail pen or a nail brush with a very thin tip, paint your watermelon seeds.  I did these diagonally outward towards the tip.  I chose to do 3 per nail, but more or less would work fine I'm sure.
6.  Finish up with a top coat

Hope you enjoy them!

Wednesday, June 9, 2010

Calling for Reinforcements!

I've been extremely upset the last couple of days.  I cried last night, I cried this morning on the way into work, I cried during work, I'm crying right now.  I know that something is wrong.  I have a general idea, but the more I think, the more of a headache I develop.  I've had a headache since I woke up.  I know that I will figure this out and then I can actually articulate it and not sound all weepy.

That being said, I know I still have some serious updates to post.  I'm hoping that will make me feel a bit better, because, let's face it, nails are what keep me happy these days.

For starters, look at the ridiculous amount of products I got at Bath & Body Works a couple of weeks ago.  They had a buy 3 get 3 free special (is that a regular thing?  If so...that's dangerous).  I'm obsessed with everything I got except for this 'Sensual Amber' shower stuff.  It's just way too sweet smelling - I feel like I'm rubbing maple syrup all over myself.  A bit much, although it IS a nice smell depending on how much of it you smell at a time.

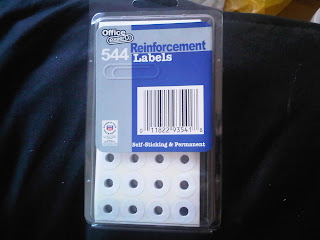
On to the nails.  I have no idea who came up with this, but it is brilliant and seems to work like a charm.  Reinforcement labels.  Amazing.  Up until now, I have used Scotch tape that I had cut into the right shapes (ghetto, right?), but it turns out these are just the right shape for french tips, reverse french, etc. 
As you can see, you just put the reinforcement label where you want it, paint over your nail and let it dry, and BAM!  All fanci-fied!  Remove the label, put some top coat on, and you're set.  In my case, I didn't let the undercoat dry quite long enough so I had to go in and make a couple of touch-ups.  I've tried this since then, though, with that in mind, and it worked like magic.

Hope you enjoy, and next time I'll be in better spirits, promise!

XXOO,
Steph

p.s. sorry for the crappy phone-taken pics!

Tuesday, June 8, 2010

Shades of Gray: a test run!

Hi y'all!
Wow, talk about delayed posting.  I've gone through a few nail changes since my last post - gotta rush to get back up to date, because I LOVE what's going on with them right now and will have to share!  :)
 
That being said, I had been dying to try gray nail polish, and finally here I was giving it a shot.  For this, I not only used gray, but also a matte top coat, so I wonder if my findings would be different if I hadn't used the matte?

Anyway:  Essie's Chinchilly polish.  Saw it.  Had to try it.  I must say, I still love the color.  I think I'm not crazy about how it looks on me, though.  If my skin was a bit lighter, I think I'd like it better.  But on me, I feel like it looks kind of like mud or something.  It strangely feels like it blends into my skin color and I'm not so sure about that ;)  Maybe I'm just so used to having elaborate nails, it just feels weird to have them be just the one color.  I think when I use this again, I'm going to try it with a glossy top coat and not the matte and see what I come up with.


Still going strong, however, is this Essie Matte About You Top Coat.  Love this stuff.  Matte is such an interesting look for nails.  I also love watching as it shifts from glossy to matte within a few seconds of painting it on!  Shouldn't be as fun to watch as it is, but let's face it - it just is!  :)

These also dried reasonably quickly, so I was super-happy about that.  I have a tendency to think my nails are dry and just ruin them by accident.  Like running my fingers through my hair.  Or making a Grilled Cheese Sandwich.  Or rolling around on the floor.  You get the idea.

Until next time!

XXOO,
Steph

Sunday, May 23, 2010

Hello Kitty!

Hi!
Ok so, I have to explain how excited I am that I actually have followers!  Now I actually have a valid excuse to do my nails all the time ;)  Welcome all!  Hooray!


This time around, I've got some Hello Kitty nails (of course)!  I found this pretty shimmery color and stamped with some black polish on top to come up with these guys.  I was walking in Walgreens the other day when I noticed a huge tub full of nail polish for 99 cents each!!!  I went a little nuts, needless to say, but that's where this shimmery guy came from.  The color is Glass Pink by Sinful Colors.  I hadn't heard of the brand before, but so far so good :)


I found these stamps on ebay, and let's just say i'm now obsessed!  They are Faux-nads, but can you guess why I got them?  Yep, this one single Hello Kitty stamp.  But, now I have the luxury of having 8 new stamp plates PLUS a Hello Kitty stamp :)  Here's the link if you want to buy some yourself:  http://cgi.ebay.com/8-Nail-Art-Stamp-Stamping-Image-Template-Free-Gift-U01B-/280509858850?cmd=ViewItem&pt=LH_DefaultDomain_0&hash=item414fb0c422


Yep, that's right.  For 8 dollars you get all of those stamping plates plus a free stamper/scraper!  Don't walk, run to this one, it is TOTALLY worth it!

Ok, yes, I do have a Hello Kitty keyboard - don't judge.  It's amazing and I got it at Best Buy.  Psh!

XXOO,
Steph

P.S.  I got a great mint lemonade that matched my Krypto-nails!  Had to take a picture ;)

Monday, May 17, 2010

Krypto-nails!

Hi everyone!
I don't know about you, but this feels like the longest work week ever, and it's only Monday.  Sigh. 

On a lighter note, we've been addicted to Smallville lately.  We're big fans of the show/Superman, and it inspired my latest nail look...Kryptonite nails!  ;)  I think my nails almost always reflect something that's going on with me at the time, so there you have it - when you watch hours upon hours of the saga that is Clark Kent, you get ideas from there!  Dorky, I know, but whatever :)
.

To do this, I had a few steps.  I used this green color I love from Sally Hansen.  It's called 'Hi-Def' nail polish, but I couldn't find the actual name of the polish color.  The lid says 'Hi-Def' as well - maybe the name is the same as the type of polish?  Psh, I  don't know.  It is a fun metallic greenish color.  I also pulled out my go-to 'Sci-fi' by China Glaze for the much necessary silvery addition to my Kryptonite.  When I realized this didn't completely show up on my nails when I stamped this color, I also decided to double-stamp them, and I liked what I came up with!  I did the first stamp with the 'Sci-Fi' color, and then just randomly stamped the same thing on top of that with a white color.  I don't think the pictures do these justice, but they are really fun :)


The stamps I used:  a 'Faux-nad' star stamp I got online (not sure the stamp #, but it came with a set of stamps that I found on ebay!), and then one of the stamps off of the M25 plate.

Saturday, May 15, 2010

I don't really know what to call this post.

*Disclaimer:  I took the pics with my phone so they're not too brilliant.  I could spend time Photoshopping them up, but I don't really feel like it right now.  :)  On to the post! 

Do you guys like Dita Von Teese?  I just LOVE her, I think she is so fabulous.  I've noticed that she does almost like a reverse French manicure on her nails, so this is kind of an indirect shoutout.  I actually was flipping through the latest Marie Claire, and noticed that there were a couple of ads with fun nail designs similar to this.  This is what actually inspired this look, but I still think Dita deserves the credit :)  Instead of doing the rounded edge on top, I tried to do a sort of pointy one to give it a funky feel.  The pointiness didn't totally work - I think I didn't wait long enough for my nails to dry.  Sigh.  I'm sure there are other methods of doing this and would love to hear what they are if anyone knows of them!

What you need:
*scissors
*scotch tape
*base and top coat
*polish color of choice

I started off by putting a base coat and letting it dry before anything else.  Unfortunately, it wasn't COMPLETELY dry by the time I started with everything else, so I had a couple of mishaps.  Whoops. 

Take the scotch tape to cut out the shapes that you want on your nails.  Once you've done this, place the scotch tape on your dry (hehe) nails where you would like the design to be.  Make sure it sticks everywhere that it needs to, so there is no bleeding around the edges.

Take your color of choice and paint over your nail and the scotch tape as you would normally.  (1-2 coats, depending on the polish).  Leave this to dry (try to make sure these guys are pretty close to dry before the next step - you don't want do mess up the crispness of the edge!).

Once you've dried, peel off your scotch tape - woo hoo!  Nail fun!  You can paint over your piggies with some top coat and you will be good to go!

Saturday, May 8, 2010

Matte About You

Helloooooo!
As I said before, I'm a fan of this matte nailpolish business.  I went to the store to get another adorable polish bottle, but instead stumbled upon a great gem - Essie's 'Matte About You' top coat!  From what I can tell, this is incredible!  It takes any polish you have on, and by just putting on a simple coat of this top coat, it turns your nail polish matte!  It seems this could save anyone a fortune in nail polish, because you don't have to buy the specific matte colors you're after - all you have to do is slap a little of this on!

I used that light blue Essie color that I'm just obsessed with right now, put a simple little nail sticker decal on it, and finished with the Matte About You top coat - voĆ­la!  These nails made me pretty hungry though.  Do they look like cake to anyone else???  MMMMM.

Sorry the quality isn't 100% and the color isn't EXACTLY like the real thing, I took these pics with my phone.

B-day/Anniversary fun!

Wow - took a bit of a break from writing anything as you can see.  I've been extremely busy, and extremely exhausted :(  I had so much energy there for a while but for whatever reason I now feel...defeated?  Wrecked?  Something...

I can't believe my sister is 21 now.  I feel so old!  Anyway, we had so much fun while she was out here in LA for her birthday!  I think it was just right, as far as 21st birthdays go.  Besides, I'm too over the hill now to really rage like a 21 year old ;)  j/k.  At midnight on her birthday, we took her to this bar called Busby's down the street (what we thought was a sports bar but turned out to be a full-on club) for a birthday shot.  Keep in mind, Anthony and I had been drinking wine all night.  She got in for free since it was her bday (woot!), and we went straight to the bar.  She had a birthday cake shot an Anthony and I had tequila shots.  Then, I don't know what possessed us but then she and I had Long Island Iced Teas and Anthony had a Gin & Tonic.  Sigh.  Needless to say, we did not go gently into that dark night.

We woke up the next morning hazy and tired, so we then went to get breakfast at the place that has the best pancakes in the u.s. (literally), Du-par's.  My sister took a nap all afternoon, then we watched a Bridezillas marathon - how is that show so addictive??  Since it was her actual birthday, we did go out to the Sunset Strip, but we only had a glass of wine each.  But, she was able to see our favorite lounge out here, Boa, and then we took her to Saddle Ranch to see some crazy drunk people fall off the mechanical bull.  Good times.

This was the same day as our 6 year anniversary!  Anthony got me the prettiest bracelet, as well as a box to put my jewelry in (I'm kind of a mess).  I <3<3<3 it!  All-in-all, despite the fact that we were all hungover, we all had a great time!


On to the most important part of all - the nails ;)  I gave my sister some special 21st bday nails - martini glass manicure!  I was jealous that she got to have the fun nails ;)  I did 2 colors - white on one half and blue on the other.  Honestly, it's been so long that I don't even remember the names of the colors I used - I think they were both Essie.  Then, I used my handy Sally Hansen Nail Art Pen to draw the martini glasses.  Lastly, I added a tiny green dot for the olives in the middle of the glasses, and finished up with a handy-dandy top coat.  Hope you like them!

Mine were a new experience for me.  Matte nail polish is all the rage, but I've never tried it.  You'll know exactly why I got this polish when you see the bottle - it's like a tiny little paint can!  Super cute!  AAAAnyway, when you use a matte polish, you can't use a base or topcoat - this was tough for me, because I always use my 'Hard As Nails' polish as my basecoat.  Oh well.  So, I used the matte polish and I must say - I'm really intrigued with the look of it!  It's so different and unique.  Of course, I never have simple nails, so I had to add more to them.  I used this light blue color from Essie that I just looove to make tiny round shapes to fill in the top part.  I don't know how to explain that, but I'll let the pictures explain for themselves.  Enjoy!  :)

I'll be back later on to go through the other nail looks I've failed to post on here in my absence!

Sunday, August 15, 2010

Summery yellow!

 
Hi all!
I decided last week that I needed something summery to do with my nails.  We just came out of June gloom here in LA, so I needed something to go with the boatloads of sunshine.  That, and I had just gotten back from my trip to visit my mom in AZ.  When I was in AZ, I stumbled upon some nail decals at the 99 Cent Store.  I'm not one to pass up nail supplies, let alone 99 cent ones, so I, of course, bought them.  I liked how these nails turned out, but the decals were a bitch to remove!  They literally would NOT be swayed by my various nail polish removers.  I had to pick these off, and luckily that didn't cause my nails to chip!  After that, I had to remove the polish that was still stuck from underneath the nails.  I'm probably complaining more than necessary, as this wasn't THAT big an issue, just a small nuisance.
 
AAAAANYWAY, here's my method for using nail decal stickers.  There may be a better way that keeps them on longer or there may be some different tricks to using them - if someone knows any, please share!
 

What you need:
*Base and Top coat
*Nail polish color
*Nail decal stickers
*Tweezers, or some other item that makes picking tiny things up easy

How you do it:
*Apply your basecoat and let dry.
*Apply 2 coats of your nail polish and let dry.
*Very carefully, grab your tweezers.
*Very carefully, use the tweezers to loosen the sticker from the sheet and pick it up.
*Using the tweezers to center in on the location where you want to place the sticker, gently place the sticker on your nail.
*With a pointy part of the tweezers, you can lightly press the sticker until it is fully attached to the nail.
*Apply your top coat and let it dry.
*Voila!  Fabulous nails!


Hope this is somewhat helpful to someone!

On another note, I'm going to really try to carry around and use a real camera for my pics in the future.  My phone pictures are just so low quality.  I generally try to mess with them a little in Photoshop to make them look better, but even that doesn't help all the time.  I hope you guys can bear with them at the moment at least! :)

XXOO,
Steph

Monday, July 19, 2010

Back from the dead!

Wow, I haven't posted on here in a LONG time.  I've been traveling, and busy with work.  Buuuut!  I'm back.  Woot.  Needless to say, I've gone through a bunch of different nails in that time period, so maybe I'll just show you pics of everything I have gone through and then come back and write about them later, if more detail is needed ;)

Let's start with my Father's Day nails!  These were special to me, because I really miss my dad.  He lives across the world and so I haven't seen him in...3 or 4 years :-/  Scary right?  Anyway, I did Sierra Leone flag nails in honor of him for Father's Day.


Then, being super-excited for Eclipse to come out, I went vampy for a good couple of weeks.  This is a blatant rip-off of Polish Hoarder Disorder (PHD)'s blog (hers were staggeringly better than mine :) ), but I really loved the look and thought it would be perfect for my vampire-themed pre-Eclipse bonanza.  This was a really frustrating look to achieve, because the color had a lot of bleed.  I used my Scotch tape trick to cover up the edges, but it didn't work super-well and I had to use nail polish remover on a Q-tip to really carefully clean them up.  It didn't fully work on some of them, so I filled in that little gap with nude-looking polish.  Oh well, I thought they looked cool in the end!


Then I went on to peacock-esque nails!  I started these with a totally different look in mind, but they kind of evolved into this.  I used light purple on the full nail, then used a dark vampy color to fill in a smaller area.  I wore it like that for a day, and decided it needed something more, so I added the mint green color and BAM!  They looked MUCH better.  Needless to say, it took longer than usual to get this polish off since there ended up being so many layers!


Lastly, I am now at the striped phase!  I've been dying to try those Art Deco nail pens and I found a ton of them at the 99 cent store while visiting my mom!  I thought stripes would be the perfect test.  They turned out great!  Definitely a good buy - I know I'll be using them a ton in the future!  I've gotten tons of compliments on these.  They definitely feel really unique.


Oh!  While I was in AZ visiting my mom, she let me do her nails!  She's never let me do them before, but after a little convincing - I got to them.  I tried using Silk Wraps on them as well, as she is often saying her nails aren't very strong.  I haven't used them before, but have really been wanting to test them out.  They are VERY cool.  And not visible at all if you smooth them out properly.  I expected her nails not to chip for a while, but she does dishes a lot, so they chipped after a few days.  Sigh.  Oh well, I thought they turned out great!  I used one of those tiny Sally Beauty Supply polishes.  It was a nice color (like a deep red) and then I stamped one of my Faux-nads onto her index fingernails with white.

Hope you enjoy!

P.S. Sorry for the quality of the pics - they were all taken with my phone ;)

Monday, June 21, 2010

Watermelons!

It's summer!  Why not celebrate it by eating some fresh fruit, hanging out by the pool/ocean, and having some good 'ol fun?  I'm quite the homebody myself, but I do enjoy the things that summer offers!  Therefore, I decided to go for some watermelon-themed nails!  Can't get much more summery than that, right?
How I did it:
1.  Start with a base coat.
2.  Paint a pink polish across entire nail (various pinks could work for this - this was the closest I had)
3.  Paint a french tip on all nails with a green color (I used Sally Hansen Hi-Def color)
4.  Allow to dry
5.  Using either a nail pen or a nail brush with a very thin tip, paint your watermelon seeds.  I did these diagonally outward towards the tip.  I chose to do 3 per nail, but more or less would work fine I'm sure.
6.  Finish up with a top coat

Hope you enjoy them!

Wednesday, June 9, 2010

Calling for Reinforcements!

I've been extremely upset the last couple of days.  I cried last night, I cried this morning on the way into work, I cried during work, I'm crying right now.  I know that something is wrong.  I have a general idea, but the more I think, the more of a headache I develop.  I've had a headache since I woke up.  I know that I will figure this out and then I can actually articulate it and not sound all weepy.

That being said, I know I still have some serious updates to post.  I'm hoping that will make me feel a bit better, because, let's face it, nails are what keep me happy these days.

For starters, look at the ridiculous amount of products I got at Bath & Body Works a couple of weeks ago.  They had a buy 3 get 3 free special (is that a regular thing?  If so...that's dangerous).  I'm obsessed with everything I got except for this 'Sensual Amber' shower stuff.  It's just way too sweet smelling - I feel like I'm rubbing maple syrup all over myself.  A bit much, although it IS a nice smell depending on how much of it you smell at a time.

On to the nails.  I have no idea who came up with this, but it is brilliant and seems to work like a charm.  Reinforcement labels.  Amazing.  Up until now, I have used Scotch tape that I had cut into the right shapes (ghetto, right?), but it turns out these are just the right shape for french tips, reverse french, etc. 
As you can see, you just put the reinforcement label where you want it, paint over your nail and let it dry, and BAM!  All fanci-fied!  Remove the label, put some top coat on, and you're set.  In my case, I didn't let the undercoat dry quite long enough so I had to go in and make a couple of touch-ups.  I've tried this since then, though, with that in mind, and it worked like magic.

Hope you enjoy, and next time I'll be in better spirits, promise!

XXOO,
Steph

p.s. sorry for the crappy phone-taken pics!

Tuesday, June 8, 2010

Shades of Gray: a test run!

Hi y'all!
Wow, talk about delayed posting.  I've gone through a few nail changes since my last post - gotta rush to get back up to date, because I LOVE what's going on with them right now and will have to share!  :)
 
That being said, I had been dying to try gray nail polish, and finally here I was giving it a shot.  For this, I not only used gray, but also a matte top coat, so I wonder if my findings would be different if I hadn't used the matte?

Anyway:  Essie's Chinchilly polish.  Saw it.  Had to try it.  I must say, I still love the color.  I think I'm not crazy about how it looks on me, though.  If my skin was a bit lighter, I think I'd like it better.  But on me, I feel like it looks kind of like mud or something.  It strangely feels like it blends into my skin color and I'm not so sure about that ;)  Maybe I'm just so used to having elaborate nails, it just feels weird to have them be just the one color.  I think when I use this again, I'm going to try it with a glossy top coat and not the matte and see what I come up with.


Still going strong, however, is this Essie Matte About You Top Coat.  Love this stuff.  Matte is such an interesting look for nails.  I also love watching as it shifts from glossy to matte within a few seconds of painting it on!  Shouldn't be as fun to watch as it is, but let's face it - it just is!  :)

These also dried reasonably quickly, so I was super-happy about that.  I have a tendency to think my nails are dry and just ruin them by accident.  Like running my fingers through my hair.  Or making a Grilled Cheese Sandwich.  Or rolling around on the floor.  You get the idea.

Until next time!

XXOO,
Steph

Sunday, May 23, 2010

Hello Kitty!

Hi!
Ok so, I have to explain how excited I am that I actually have followers!  Now I actually have a valid excuse to do my nails all the time ;)  Welcome all!  Hooray!


This time around, I've got some Hello Kitty nails (of course)!  I found this pretty shimmery color and stamped with some black polish on top to come up with these guys.  I was walking in Walgreens the other day when I noticed a huge tub full of nail polish for 99 cents each!!!  I went a little nuts, needless to say, but that's where this shimmery guy came from.  The color is Glass Pink by Sinful Colors.  I hadn't heard of the brand before, but so far so good :)


I found these stamps on ebay, and let's just say i'm now obsessed!  They are Faux-nads, but can you guess why I got them?  Yep, this one single Hello Kitty stamp.  But, now I have the luxury of having 8 new stamp plates PLUS a Hello Kitty stamp :)  Here's the link if you want to buy some yourself:  http://cgi.ebay.com/8-Nail-Art-Stamp-Stamping-Image-Template-Free-Gift-U01B-/280509858850?cmd=ViewItem&pt=LH_DefaultDomain_0&hash=item414fb0c422


Yep, that's right.  For 8 dollars you get all of those stamping plates plus a free stamper/scraper!  Don't walk, run to this one, it is TOTALLY worth it!

Ok, yes, I do have a Hello Kitty keyboard - don't judge.  It's amazing and I got it at Best Buy.  Psh!

XXOO,
Steph

P.S.  I got a great mint lemonade that matched my Krypto-nails!  Had to take a picture ;)

Monday, May 17, 2010

Krypto-nails!

Hi everyone!
I don't know about you, but this feels like the longest work week ever, and it's only Monday.  Sigh. 

On a lighter note, we've been addicted to Smallville lately.  We're big fans of the show/Superman, and it inspired my latest nail look...Kryptonite nails!  ;)  I think my nails almost always reflect something that's going on with me at the time, so there you have it - when you watch hours upon hours of the saga that is Clark Kent, you get ideas from there!  Dorky, I know, but whatever :)
.

To do this, I had a few steps.  I used this green color I love from Sally Hansen.  It's called 'Hi-Def' nail polish, but I couldn't find the actual name of the polish color.  The lid says 'Hi-Def' as well - maybe the name is the same as the type of polish?  Psh, I  don't know.  It is a fun metallic greenish color.  I also pulled out my go-to 'Sci-fi' by China Glaze for the much necessary silvery addition to my Kryptonite.  When I realized this didn't completely show up on my nails when I stamped this color, I also decided to double-stamp them, and I liked what I came up with!  I did the first stamp with the 'Sci-Fi' color, and then just randomly stamped the same thing on top of that with a white color.  I don't think the pictures do these justice, but they are really fun :)


The stamps I used:  a 'Faux-nad' star stamp I got online (not sure the stamp #, but it came with a set of stamps that I found on ebay!), and then one of the stamps off of the M25 plate.

Saturday, May 15, 2010

I don't really know what to call this post.

*Disclaimer:  I took the pics with my phone so they're not too brilliant.  I could spend time Photoshopping them up, but I don't really feel like it right now.  :)  On to the post! 

Do you guys like Dita Von Teese?  I just LOVE her, I think she is so fabulous.  I've noticed that she does almost like a reverse French manicure on her nails, so this is kind of an indirect shoutout.  I actually was flipping through the latest Marie Claire, and noticed that there were a couple of ads with fun nail designs similar to this.  This is what actually inspired this look, but I still think Dita deserves the credit :)  Instead of doing the rounded edge on top, I tried to do a sort of pointy one to give it a funky feel.  The pointiness didn't totally work - I think I didn't wait long enough for my nails to dry.  Sigh.  I'm sure there are other methods of doing this and would love to hear what they are if anyone knows of them!

What you need:
*scissors
*scotch tape
*base and top coat
*polish color of choice

I started off by putting a base coat and letting it dry before anything else.  Unfortunately, it wasn't COMPLETELY dry by the time I started with everything else, so I had a couple of mishaps.  Whoops. 

Take the scotch tape to cut out the shapes that you want on your nails.  Once you've done this, place the scotch tape on your dry (hehe) nails where you would like the design to be.  Make sure it sticks everywhere that it needs to, so there is no bleeding around the edges.

Take your color of choice and paint over your nail and the scotch tape as you would normally.  (1-2 coats, depending on the polish).  Leave this to dry (try to make sure these guys are pretty close to dry before the next step - you don't want do mess up the crispness of the edge!).

Once you've dried, peel off your scotch tape - woo hoo!  Nail fun!  You can paint over your piggies with some top coat and you will be good to go!

Saturday, May 8, 2010

Matte About You

Helloooooo!
As I said before, I'm a fan of this matte nailpolish business.  I went to the store to get another adorable polish bottle, but instead stumbled upon a great gem - Essie's 'Matte About You' top coat!  From what I can tell, this is incredible!  It takes any polish you have on, and by just putting on a simple coat of this top coat, it turns your nail polish matte!  It seems this could save anyone a fortune in nail polish, because you don't have to buy the specific matte colors you're after - all you have to do is slap a little of this on!

I used that light blue Essie color that I'm just obsessed with right now, put a simple little nail sticker decal on it, and finished with the Matte About You top coat - voĆ­la!  These nails made me pretty hungry though.  Do they look like cake to anyone else???  MMMMM.

Sorry the quality isn't 100% and the color isn't EXACTLY like the real thing, I took these pics with my phone.

B-day/Anniversary fun!

Wow - took a bit of a break from writing anything as you can see.  I've been extremely busy, and extremely exhausted :(  I had so much energy there for a while but for whatever reason I now feel...defeated?  Wrecked?  Something...

I can't believe my sister is 21 now.  I feel so old!  Anyway, we had so much fun while she was out here in LA for her birthday!  I think it was just right, as far as 21st birthdays go.  Besides, I'm too over the hill now to really rage like a 21 year old ;)  j/k.  At midnight on her birthday, we took her to this bar called Busby's down the street (what we thought was a sports bar but turned out to be a full-on club) for a birthday shot.  Keep in mind, Anthony and I had been drinking wine all night.  She got in for free since it was her bday (woot!), and we went straight to the bar.  She had a birthday cake shot an Anthony and I had tequila shots.  Then, I don't know what possessed us but then she and I had Long Island Iced Teas and Anthony had a Gin & Tonic.  Sigh.  Needless to say, we did not go gently into that dark night.

We woke up the next morning hazy and tired, so we then went to get breakfast at the place that has the best pancakes in the u.s. (literally), Du-par's.  My sister took a nap all afternoon, then we watched a Bridezillas marathon - how is that show so addictive??  Since it was her actual birthday, we did go out to the Sunset Strip, but we only had a glass of wine each.  But, she was able to see our favorite lounge out here, Boa, and then we took her to Saddle Ranch to see some crazy drunk people fall off the mechanical bull.  Good times.

This was the same day as our 6 year anniversary!  Anthony got me the prettiest bracelet, as well as a box to put my jewelry in (I'm kind of a mess).  I <3<3<3 it!  All-in-all, despite the fact that we were all hungover, we all had a great time!


On to the most important part of all - the nails ;)  I gave my sister some special 21st bday nails - martini glass manicure!  I was jealous that she got to have the fun nails ;)  I did 2 colors - white on one half and blue on the other.  Honestly, it's been so long that I don't even remember the names of the colors I used - I think they were both Essie.  Then, I used my handy Sally Hansen Nail Art Pen to draw the martini glasses.  Lastly, I added a tiny green dot for the olives in the middle of the glasses, and finished up with a handy-dandy top coat.  Hope you like them!

Mine were a new experience for me.  Matte nail polish is all the rage, but I've never tried it.  You'll know exactly why I got this polish when you see the bottle - it's like a tiny little paint can!  Super cute!  AAAAnyway, when you use a matte polish, you can't use a base or topcoat - this was tough for me, because I always use my 'Hard As Nails' polish as my basecoat.  Oh well.  So, I used the matte polish and I must say - I'm really intrigued with the look of it!  It's so different and unique.  Of course, I never have simple nails, so I had to add more to them.  I used this light blue color from Essie that I just looove to make tiny round shapes to fill in the top part.  I don't know how to explain that, but I'll let the pictures explain for themselves.  Enjoy!  :)

I'll be back later on to go through the other nail looks I've failed to post on here in my absence!